
How to Shrink a Windows 7 Hard Drive Partition and Create New Drives
Learn how to shrink a Windows 7 partition, create new drives using Disk Management and DiskPart, and resolve the "You cannot shrink a volume beyond the point where any unmovable files are located" error.
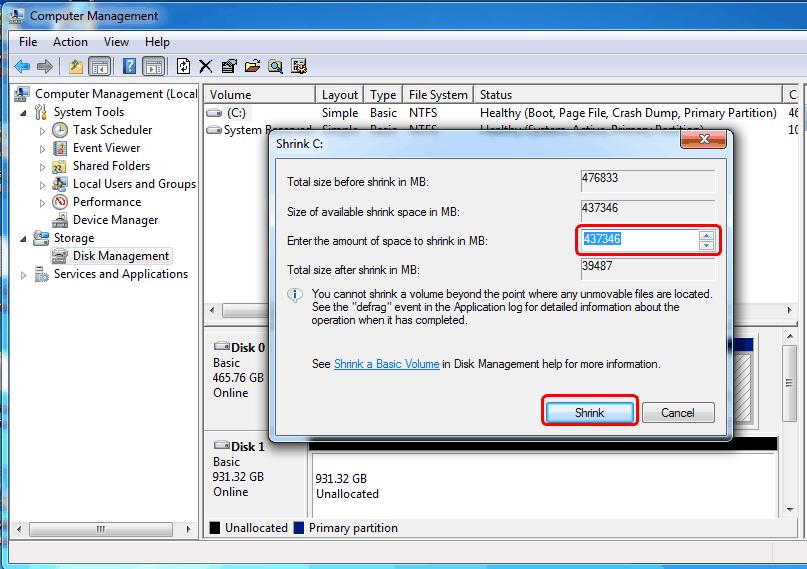
Problem
Unable to shrink the C: drive in Windows 7 beyond a certain size, even though sufficient free space is available.
Symptoms
- The Shrink Volume option shows less available shrink space than expected.
- Error message: "You cannot shrink a volume beyond the point where any unmovable files are located."
- A large amount of free disk space is available, but it cannot be used for shrinking.
- Unable to create desired partition sizes.
Cause
Windows cannot move certain system files while the operating system is running. Files such as Pagefile.sys, Hiberfil.sys, System Restore data, Shadow Copies, and the NTFS Master File Table (MFT) can prevent further shrinking of a partition.
Step-by-Step Fix
Step 1: Check Available Shrink Space
- Press Windows + R.
- Type
diskmgmt.mscand press Enter. - Right-click the C: drive and select Shrink Volume.
- Review the available shrink size reported by Windows.
Step 2: Disable Hibernation
Open Command Prompt as Administrator and run:
powercfg -h off
Step 3: Disable Page File
- Right-click Computer and select Properties.
- Click Advanced System Settings.
- Open Performance Settings.
- Select the Advanced tab.
- Click Change under Virtual Memory.
- Select No Paging File.
- Restart the computer.
Step 4: Disable System Restore
- Open System Protection.
- Select the system drive.
- Click Configure.
- Turn off system protection temporarily.
Step 5: Consolidate Free Space
Run the following command as Administrator:
defrag C: /X
This consolidates free space and may increase the available shrink size.
Step 6: Shrink the Partition
- Open Disk Management.
- Right-click C: drive.
- Select Shrink Volume.
- Enter the desired shrink size.
- Click Shrink.
Step 7: Create a New Partition
- Right-click the Unallocated Space.
- Select New Simple Volume.
- Assign a drive letter.
- Format the partition as NTFS.
- Complete the wizard.
Using DiskPart Command
diskpart
list disk
select disk 0
list volume
select volume C
shrink desired=102400
create partition primary
format fs=ntfs quick
assign letter=D
Additional Recommendation
If Windows still cannot shrink the partition enough, use advanced partition management tools such as GParted, MiniTool Partition Wizard, or AOMEI Partition Assistant to move unmovable system files.
Frequently Asked Questions
Why can't Windows 7 shrink my partition fully?
Windows cannot move certain system files such as the page file, hibernation file, and NTFS Master File Table while the operating system is running.
How do I increase available shrink space?
Disable hibernation, paging file, and system restore, then run defrag C: /X and restart the system.
Can I create D and E drives after shrinking C?
Yes. After shrinking the C drive, use the unallocated space to create new partitions and assign drive letters.
Is DiskPart safe for partition management?
Yes, but always back up important data before making partition changes.